Hi everyone!
Recently we received S’s new pump which was very exciting!
Unfortunately we have had to wait almost two weeks and are still waiting for our pump start class. And even after that class we will have to wait another week before going “live” with the insulin. Sigh.
In the meantime I have been busy working on designing a pattern for pump pouches.
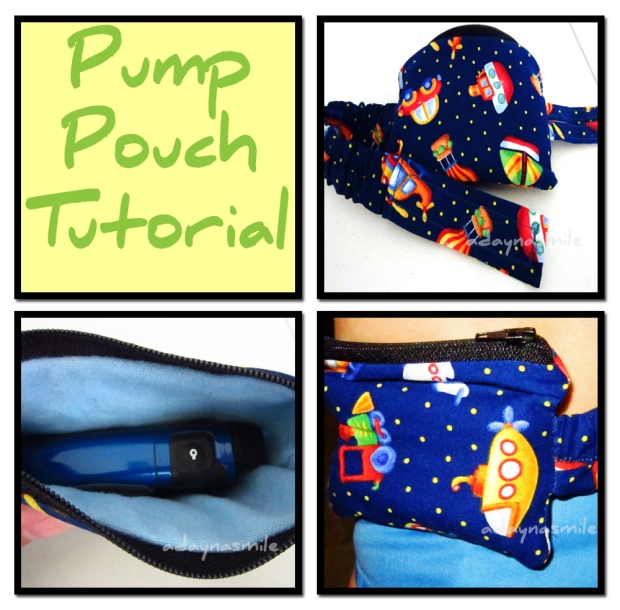
Now if you don’t know anything about diabetic pumps then you have no idea what a pump pouch is. Basically it is a small fanny pack (yeah think back to those good old 80s!) that the child (and some adults) wear to contain their pump.
There are a LOT of different companies that make these. If you google, you will find a number of WAHM type companies that make a variety of different pump pouches. But here’s the problem. They tend to be EXPENSIVE! One company makes some adorable products but charges $40 or more for a simple pump pouch. And since it takes very little material, and time to make your own, I wondered why no one had created a tutorial to do just that.
So here’s my attempt at a tutorial. Please bear with me as we have not truly tested these out. I am just basing them on the ones on the market. As we use them I intend to update the tutorial to fix any issues we may occur. But I would LOVE any input from anyone who tries them out. Let me know any flaws you see or anything that you struggle with understanding. I love your feedback!
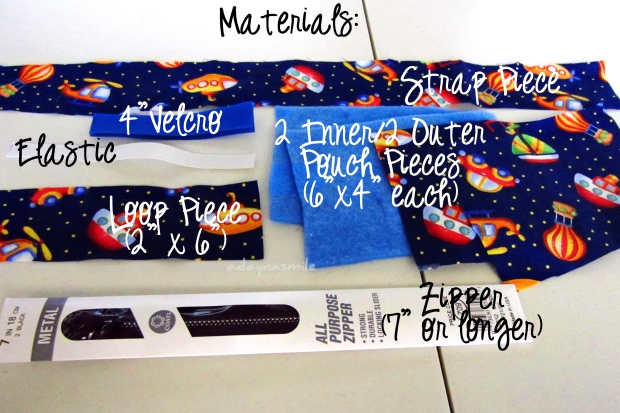
Materials needed:
~ 1 zipper that is at least 7″ long (I chose a metal one for its durability. A sport zipper would be another good option.)
~ 4″ of hook, and 4″ of loop that is 3/4″ wide
~ 2 pieces of decorative cotton/flannel fabric cut to 6″ x 4″
~ 2 pieces of a softer fabric (flannel is a great option) cut to 6″ x 4″
~ 1 piece of coordinating fabric that is 2″ x 6″
~ 1 piece of coordinating fabric that is 3″ by measurement A (see below for instructions)
~ Piece of 3/4″ elastic cut to measurement B (see below for instructions)
Directions:
1. Lets start with some math so you can get correct measurements. First, measure your child’s waist. Don’t make the measuring tape too tight or you will end up with a tight belt. Put it on your child exactly as you would the belt of the pump pouch. Write that number down. I’m going to give you my son’s measurements in hopes of making this clear.
Waist: 18″
Now, take that number (whatever it is) and subtract 10″ from it. Write that number down. This is your “magic number.” In my case, that number is 8″.
To get number A take your magic number and add 9″ to it. In my case, number A is 17″. This is going to be the length of your waistband piece. Cut your waistband piece out of coordinating fabric to be 3″ X YOUR number A.
Now go back to your magic number. This time subtract 2″. In my case, this resulted in 6″. This is number B and the length to cut your elastic. Make sure to make a note of all these numbers for future reference.
2. Make sure you have all your pieces measured and cut out. It is important to have it all prepped so that you can quickly move from one section of the pouch to another without too much complication.
Belt:
Lets start with the belt portion of the pouch.
1. Fold your 3″ wide waist strip in half width wise, right sides together. It will still be as long as your number A but will now be 1.5″ wide.
2. Stitch down the length of the strip. I use a 1/4″ seam allowance all the way through this project.
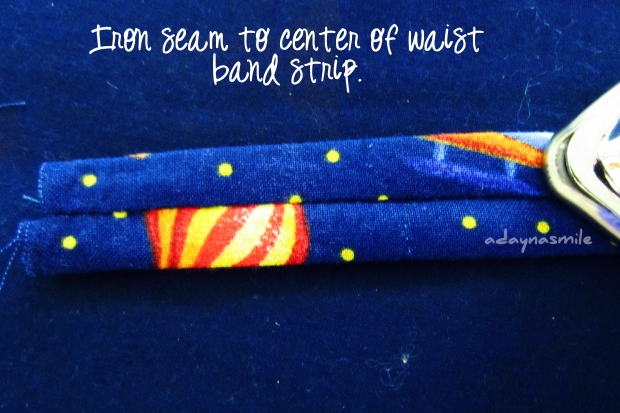
3. Turn. (This may be a bit tricky since it is so long and skinny. Make sure you take your time to turn it carefully). Iron so that the seam is in the center of the strip.
4. Mark 9″ down from one side of the strip (a). The velcro will be placed in this 9″ section. For now, just mark it and leave the ends open.
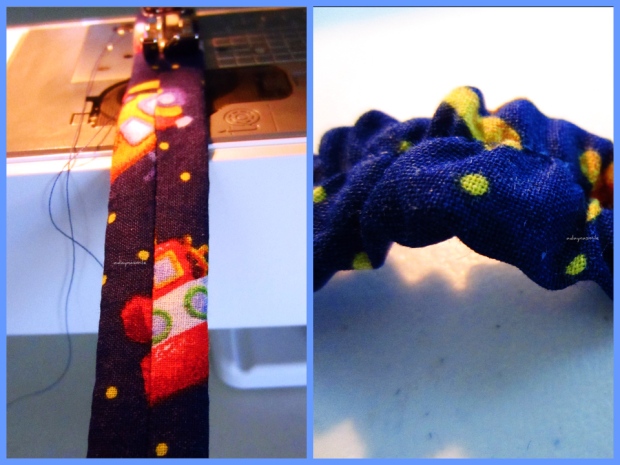
5. Feed elastic to this marking. I find it easiest to put a safety pin on the end of my elastic and feed it through the end of the strip where the velcro will be going (b). When I feel that the end of the elastic that does not have a pin on it has reached my mark, I stop feeding it and stitch it into place (c). Use a simple straight stitch across the width of the elastic making sure to catch at least 1/4″ of elastic. Backstitch several times to secure. Pull the elastic the rest of the way through (d) and stitch to the end of the tube (e). Again, backstitch several times. (This is a bit tricky but is totally doable. Just take it one step at a time.)
6. Now find the end of the elastic that you stitched in place 9″ from the edge. Place the strap under the foot of the sewing machine, lengthwise, with the seam on top. Insert the needle into the seam. Stretch the elastic so that the fabric is flat. You do not want any bunching at this point. Keep stretching on both ends of the elastic while stitching down the center seam. This step is important to keep the elastic from rolling.
7. Fold in the ends on the end of the strap without the elastic. Stitch closed. Add velcro, placing the hook and loop next to one another lengthwise.
Set aside for the time being.
Loop:
1. Take the 2″ X 6″ piece of fabric. Fold ends to the center. Iron.
2. Fold in half. Iron again.
3. Stitch all the way around the folded fabric as close to the ends as possible.
4. Fold in half. Line the ends up next to one another, and stitch in place.
Pouch:
Update: My son has been wearing his pouch all day today. We have had great success with it, but I think that the pouch itself is a bit tall. I think next time I make one of this design I would take a half inch off of the height. So instead of using the measurements below, I would use 6″ x 3.5″. This will make the pump fit tighter into the pouch. Keep in mind that we use the Animas pump and that your pump may need the larger pouch size.
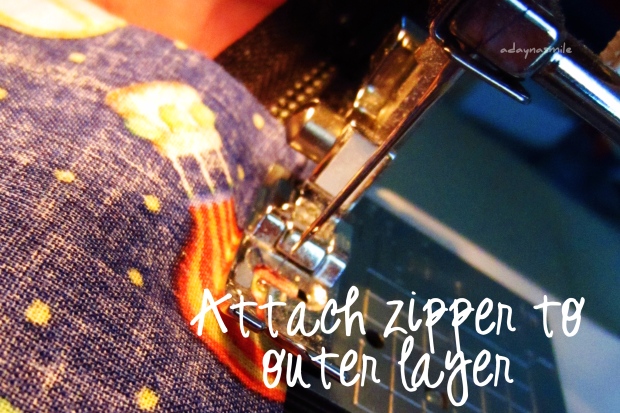
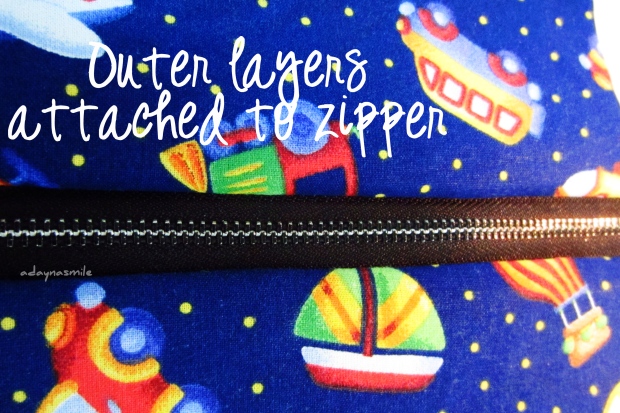
1. Start with one of the 6″ x 4″ pieces of fabric and your zipper. Lay the fabric upside down on the zipper so that the fabric is over the zipper (wrong side up), and the edge meets the edge of the zipper. If it is a fabric with a print, make sure that when it flips over it will be facing the direction you want it to face. Make sure to place it in the middle of the zipper. Stitch along the length of the fabric. (Note: I do not always use a zipper foot. My regular foot placed up against the zipper creates a nice stitch close to the edge of the zipper and creates a nice straight line.)
2. Repeat on the other side of the zipper with the second outer piece of fabric. It should look like this when finished.
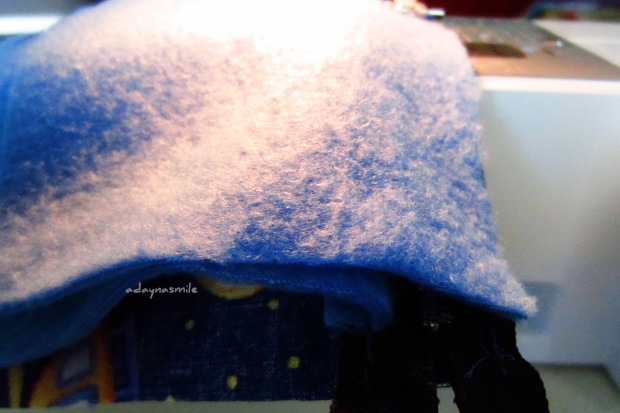
3. Repeat the process with the liner fabric on the backside of the zipper.
4. Measure one inch down from the zipper on either side of one of the outer pieces. Pin the belt strap on one side, and the loop on the other, ends touching ends. Stitch in place backstitching several times. Keep within the 1/4″ seam allowance.
5. Pin the outer fabrics together, right sides touching, making sure to tuck the strap between the two pieces so that they do not get sewn on (other than the ends that you have already stitched in place).
6. Pin the liner fabrics right sides together. Adjust the zipper so that the teeth are facing towards the liner pieces.
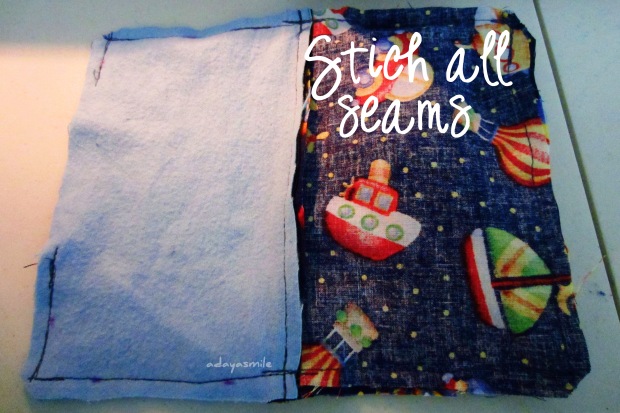
7. Stitch all around the pouch leaving a 2″ gap in the liner for turning. Use a 1/4″ seam allowance. Make sure to backstitch a few times over the zipper ends, and over the strap/loop. Clip corners, and zipper.
8. Turn right side out, leaving the liner out of the outer portion of the pouch. Fold ends into the open gap. Stitch over the entire bottom portion to seal the gap.
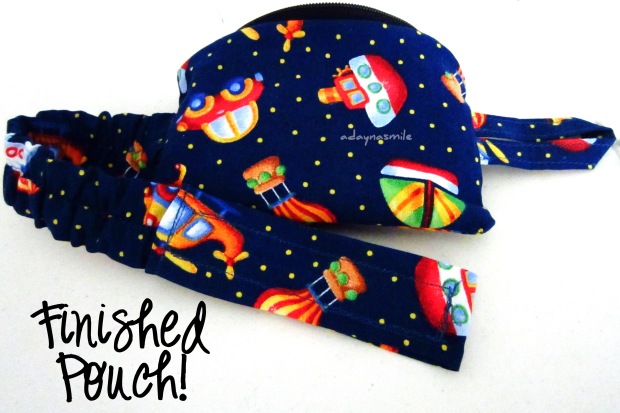
9. Push the liner into the pouch. Admire your handiwork!
I’d love to see your pictures. Share a link back in the comment section to your pump pouch if you make one. And remember to let me know what does and doesn’t work for you. I love to read your comments!
Hope this helps all you pumping mamas out!
Blessings!











I love your pouches. I made one ajustment that you might like. My little granddaughters pouch kept moving around her waist. I took the same fabric as the out side made a pocket using 3/4 elastic in side. Attached a suspenders clip.
Then sewed it in the center of the pouch. I do this when I attacted the loop, belt. This way she has a clip that can clip to pants.
Louise
Awesome! Thanks for sharing. If you want to upload a photo on my Facebook page (Facebook.com/adaynasmilescreations) I’d love to see it!
Hi there. Fantastic tutorial! I was just wondering if you’ve tried keeping a hole or slit at the back for the tubing to go through? Or did you just keep it hanging from near the zipper opening?
Thanks for sharing your creativity!
I’m so sorry for my delay in responding. Glad you liked the tutorial. We have tried a buttonhole in the back but honestly find it annoying to have to unplug the pump and put it through the hole anytime we change pouches. It has worked for us to just let it hang from the zipper opening. But if you want a buttonhole on the back, just add it to the middle of the large pouch piece before putting in the zipper. Make sure to use some interfacing between the fabrics where you are putting in the buttonhole for stabilization. Hope that helps! Happy sewing!
My granddaughter asked me to try making pouches for her 2 kids, ages 3 and 7, who have both had type 1 diabetes since age 2. I have extensive sewing skills unused for the past number of years, due to age and preretirement. Since retiring I have dragged out my sewing machine. I had no idea where to start but definitely wanted to help, especially after finding out how much these sell for and the great need for these active great grandkids. I loved your tutorial and cannot wait to try using all my various “scraps” of fabric for these needed devices. Thank you in advance to your creativity and willingness to share. God Bless You.